Few months ago, when I moved to my current apartment, I bought this tiny little NAS used but in perfect condition to be part of my home network. I quickly found out it has quite a few drawbacks, but most of them I was able to find a way around, and taking into account how cheaply I’ve got it – I was happy with it. Till the end of the year I want to get full sized server so probably it wont be needed anymore, and for current usage it was almost perfect. More on it it another post, but today I wanted to write more about that “almost” part…
Yes, there was one extremely annoying thing about it. It was LOUD. And I mean – extremely loud for such small, low power device. It has just little 40x40mm fan and it’s making soooo much noise… I haven’t done any measurements but to be honest I felt like it was more annoying than my powerful i7-7700K workstation! With all it’s multiple fans – at night, when sometimes i left it working, it still had more pleasant sound than this little howling monster…

During a day it’s not a problem. All the sound around completely mask it. But when the night comes and I want to fall asleep it was definitely irritating. Also the fan was working most of the time, air circulation must have been quite bad as it has only some small holes on the top of it. Biggest difference was when it stopped – it was a real relief.
For first few nights it was terrible but to be honest, in the end, I quickly got used to it. But now, after around 3 months I decided to finally do something about it.
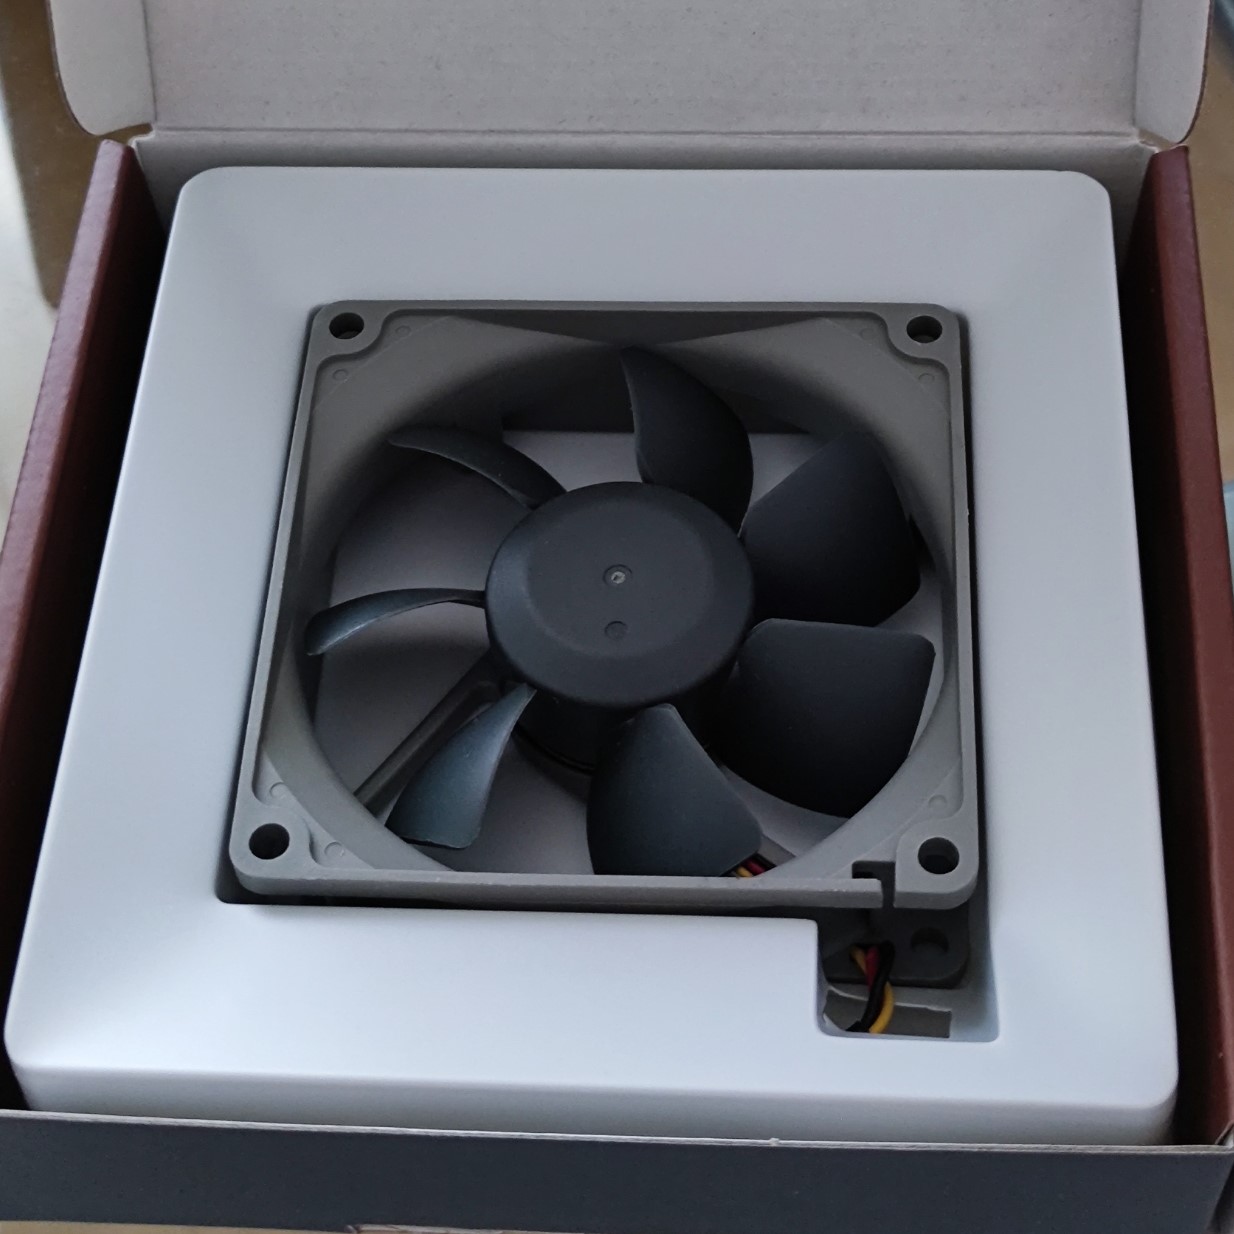
Here comes Noctua NF-R8 redux-1200:


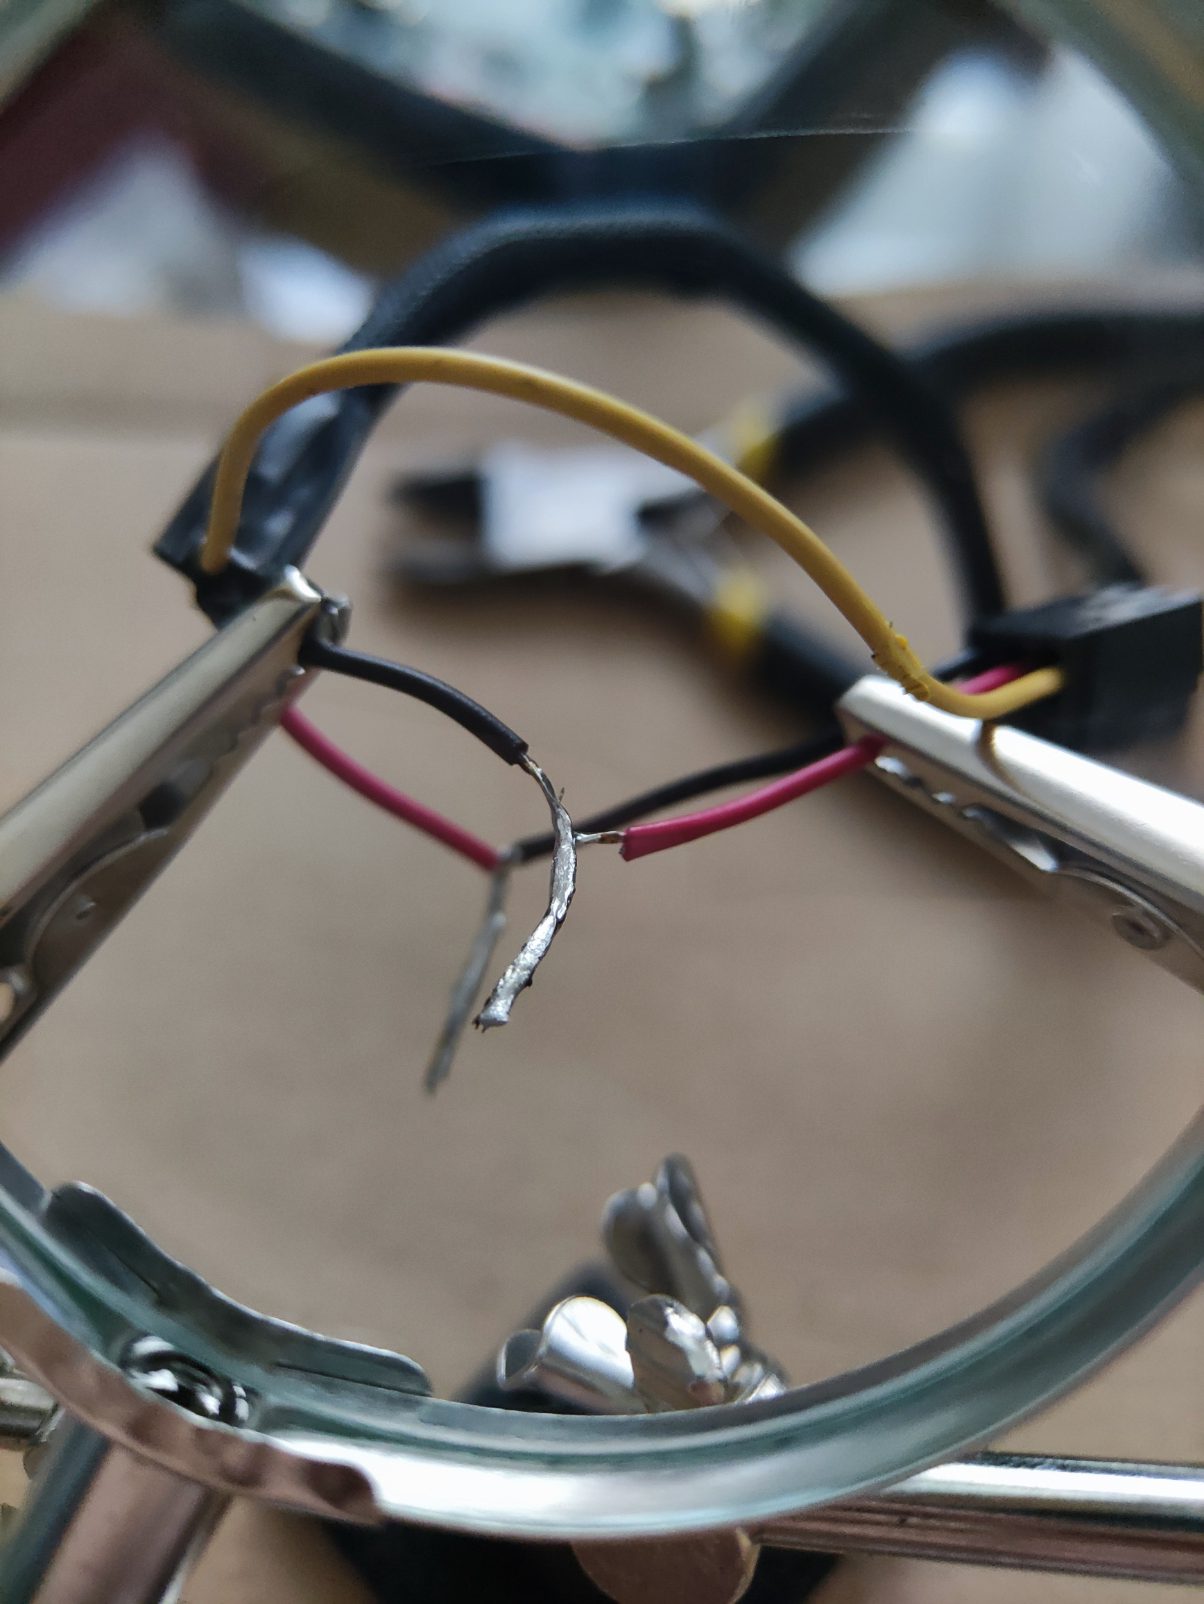
First of all from multiple sources I knew that this NAS has it’s polarity on fan cable reversed. I dissembled it and in fact – colors of cables in connector confirmed it – red and black are reversed (white connector is original one, black – Noctua). That’s how it looks inside, just look how small original fan was:


There was no point in testing it without that change so I cut the wires, took my new soldering station and swapped + and – cables. Yes, it was my first time soldering so don’t laugh please 🙂 And also take a look at size comparison – the difference is quite obvious:


Ok, everything done, so I connected it, booted up the NAS, logged in to GUI to change fan settings to alway-high – otherwise it wouldn’t work, as without the case everything would be obviously cool – and… Et voilà – it works! Only problem was that it was showing incorrect fan speed – this is 1200RPM max fan and it’s showing as going up to 60000RPM – but I can live with that as long as it’s working and modifying speed when needed.


Next step then was to find a way to install it somehow. I removed original one, but this wouldn’t fit there of course, I thought about putting it under top cover, but there was not enough room between disks and cover, so I decided to put in on top of device. It was perfectly sized to fit there, it was just a little bit narrower than the cover. The idea was that it will be sucking air through original fan opening and blow it out of the top. So let’s do it:


I cut a hole in the cover, put a small dent for a cable and secured fan in place with hot glue. As it was light grey I decided to hide it a bit with electric tape. Yes, I know, it looks terrible when looking from up close 🙂 – but it’s not a thing that is looked up that way, it will just sit in between other equipment and be visible from far away only.
After that I’ve put the device in it’s place and did some quick testing. When idling fan was not moving at all – I guess new big hole on the top was just enough for warm air to escape through good old convection. Temperature was keeping still at 39-40°C.
I started transferring some big files from it, CPU utilization jumped to around 50%, temperature rose to 45-46°C and fan started as it should. Also it was changing speed – so everything looks great!
Screenshot on the right is from later time, I did more thorough testing before but forgot to take screens – but trust me, results were the same.
In the end I decided to make one last small change – as it has a lot of holes on the bottom I put it on it’s side. That way on one hand – there is no big hole on the top that dust can easily fall down through, and on the other, more important, now outside air can be sucked through bottom also, where it flows around circuit board cooling it, as the back hole is much higher and air was going only in between disks. I lost convection that way, but when idling fan was still not spinning and in turn it should be much more effective due to cooling all electronic parts now.

In the end – the cost was minimal (although fan costed me almost half of what I’ve paid for the NAS without disk!) and now when I try to sleep I don’t here it anymore – even if it works it’s still extremely silent and it runs much less now! The only problem now – how to make refrigerator in the kitchen quieter… But it’s completely different topic 🙂